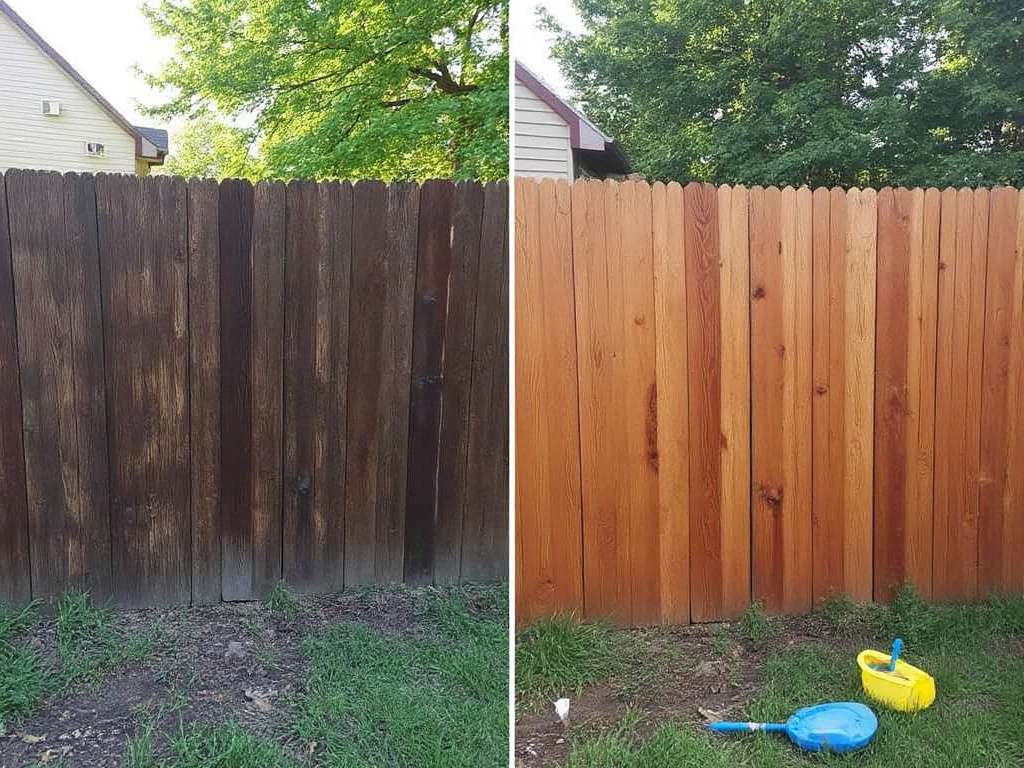
Are you looking to revitalize your wooden fence with a fresh coat of stain? Before you grab that brush, it’s crucial to clean the fence to ensure the best results properly. A clean surface ensures better stain adhesion and a longer-lasting finish. In this comprehensive guide, we’ll walk you through the essential steps to clean your wood fence before staining, helping you achieve stunning results that will make your neighbors envious.
Why Cleaning Your Fence is Crucial
Before we dive into the cleaning process, let’s understand why this step is so important. A dirty fence can make it difficult for stain to penetrate the wood, causing an uneven finish and peeling earlier than expected, something homeowners want to avoid. Moreover, cleaning removes harmful contaminants like mold, mildew, and algae that can damage the wood over time.
The Benefits of a Clean Fence
- Better stain adhesion
- Longer-lasting finish
- Removal of harmful contaminants is an essential step to clean a fence effectively.
- Improved overall appearance
Assessing Your Fence’s Condition
Before you start cleaning, inspect your fence for damage, loose boards, or protruding nails. This assessment will help you determine the best cleaning method and identify any repairs needed before staining.
What to Look For:
- Loose or damaged boards
- Protruding nails
- Signs of rot or decay
- Mold, mildew, or algae growth
Choosing the Right Cleaning Method
Different methods can be used to clean a wood fence. The most suitable method will depend on the condition of your fence and the tools you have.
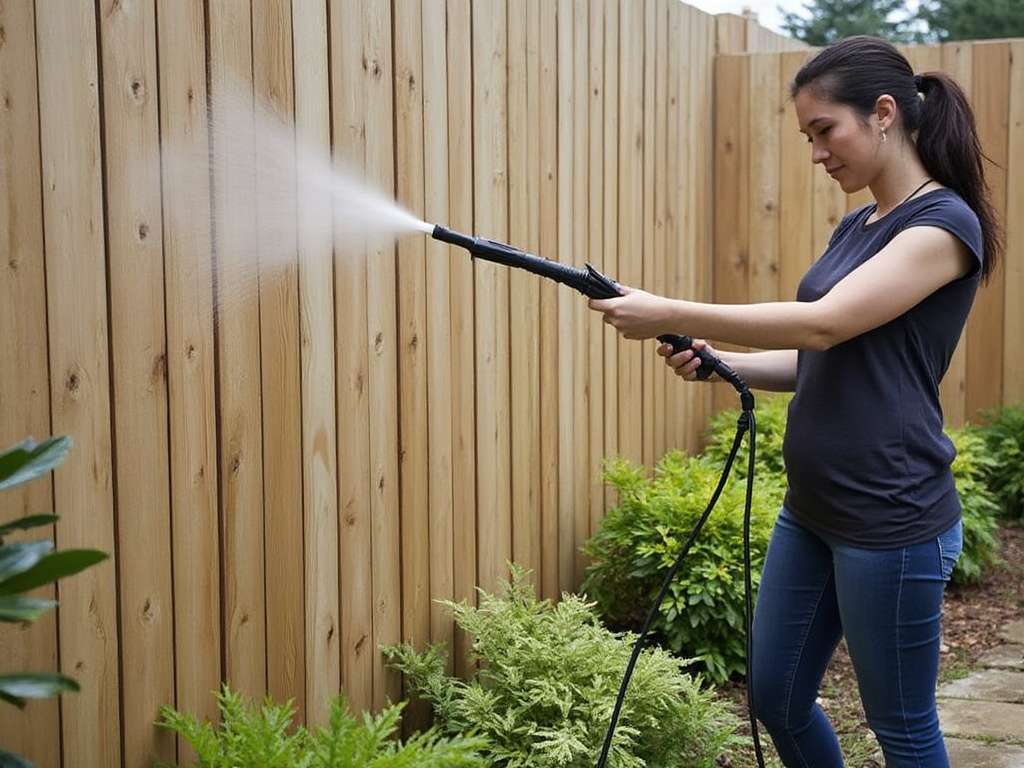
1. Pressure Washing
Pressure washing is one of the most effective methods for cleaning a wood fence, especially for tough dirt and grime. However, it’s important to use the right pressure to avoid damaging the wood.
Tips for Pressure Washing:
- Use 500-600 PSI for soft woods like pine or cedar
- Use 1,200-2,000 PSI for harder woods
- Start from the top and work in small areas
- Keep the nozzle moving to avoid damage
- Use a 25-degree nozzle or aim at an angle
- Keep the nozzle at least 3 feet away initially
Learn more about pressure washing techniques
2. Manual Cleaning
For those who prefer a gentler approach or don’t have access to a pressure washer, manual cleaning is a viable option.
Manual Cleaning Steps:
- Use a stiff brush, sponge, and cleaning solution
- Scrub each board individually to ensure you get the best clean possible before applying any finish.
- Let the cleaner sit for 3-5 minutes
- Rinse thoroughly with clean water
Discover more about manual cleaning methods
3. Gentle Cleaning for Lightly Dirty Fences
If your fence is only lightly dirty, a gentle cleaning approach might be sufficient.
Gentle Cleaning Options:
- Use a mild detergent or outdoor cleaner
- Scrub with a stiff brush to remove dirt
- Rinse with a garden hose
Find out more about gentle cleaning techniques
Preparing Your Cleaning Solution
The right cleaning solution can make a big difference in the effectiveness of your cleaning process. Here are some options:
1. Commercial Cleaners
Use 1.5 cups of commercial fence cleaner per 2 gallons of water to create an effective solution for cleaning the fence. These cleaners are specifically formulated for wood fences and can be very effective.
2. DIY Cleaner

For a more budget-friendly option, you can make your own cleaner:
- Mix 1 cup vinegar
- 1 gallon water
- A squirt of dish soap
3. Bleach Solution for Mold and Mildew
If you’re dealing with mold, algae, or mildew, a bleach solution can be effective:
- Mix 2 parts bleach with 1 part water
- Apply before using fence cleaner
4. TSP and Bleach Mixture
For larger projects, a mixture of trisodium phosphate (TSP) and household bleach can be cost-effective when using a power washer.
- Combine TSP and bleach according to package instructions
- This mixture is particularly effective for tough stains and large areas
Learn more about cleaning solutions
The Cleaning Process
Now that you’ve chosen your method and prepared your cleaning solution, it’s time to get to work.
Step 1: Protect the Surrounding Area
Before you start cleaning, take steps to protect the area around your fence:
- Cover nearby plants with plastic sheeting to protect them from the spray during the fence cleaning process.
- Move outdoor furniture and decorations away from the fence
- Wear protective gear like safety goggles, gloves, and appropriate clothing
Step 2: Apply the Cleaning Solution
Whether you’re using a pressure washer or manual method:
- Start at the top of the fence
- Work in small sections
- Apply the cleaning solution evenly
- Allow the solution to sit for 5-10 minutes (follow product instructions)
Step 3: Scrub or Pressure Wash
- If pressure washing, keep the nozzle moving to avoid damage
- If scrubbing manually, use a stiff brush and apply firm pressure
Step 4: Rinse Thoroughly
- Use clean water to rinse the fence completely
- Ensure all cleaning solution is removed to prevent interference with staining
Step 5: Address Stubborn Stains
For tough stains or gray wood:
- Use a specialized wood cleaner or brightener
- For gray wood, a mild solvent power wash can help restore color
Discover more about dealing with tough stains
Drying and Preparing for Staining
After cleaning, it’s crucial to allow your fence to dry completely before staining.
Drying Time:
- Allow at least 48 hours of drying time
- Ensure the wood is completely dry to touch
- Check weather forecasts to avoid rain during drying period
Final Inspection:
- Once dry, inspect the fence for any missed spots or remaining stains
- Sand any rough areas or splinters
- Remove any loose wood fibers with a brush
Learn more about preparing for staining
Timing Your Fence Cleaning and Staining Project
Choosing the right time for your project can make a big difference in the results.
Best Time to Clean and Stain:
- Summer is generally the best season
- Choose a period with several dry days forecasted
- Avoid extremely hot or humid days
Special Considerations:
- For new pressure-treated fences, wait 1-2 months before staining
- Clean both sides of the fence if possible to prevent warping
Find out more about timing your project
Wrapping Up: Your Path to a Beautiful Fence
Cleaning your wood fence before staining is a crucial step that shouldn’t be overlooked. By following these steps, you’re setting the stage for a beautiful, long-lasting finish that will protect your fence and enhance your home’s curb appeal, making you a proud homeowner.
Remember, the key to success lies in thorough preparation, choosing the right cleaning method and products, and allowing adequate drying time. With a little effort and patience, you’ll be rewarded with a stunning fence that will be the envy of the neighborhood.
Now that you’re armed with this knowledge, it’s time to roll up your sleeves and get to work. Your beautifully cleaned and stained fence awaits!