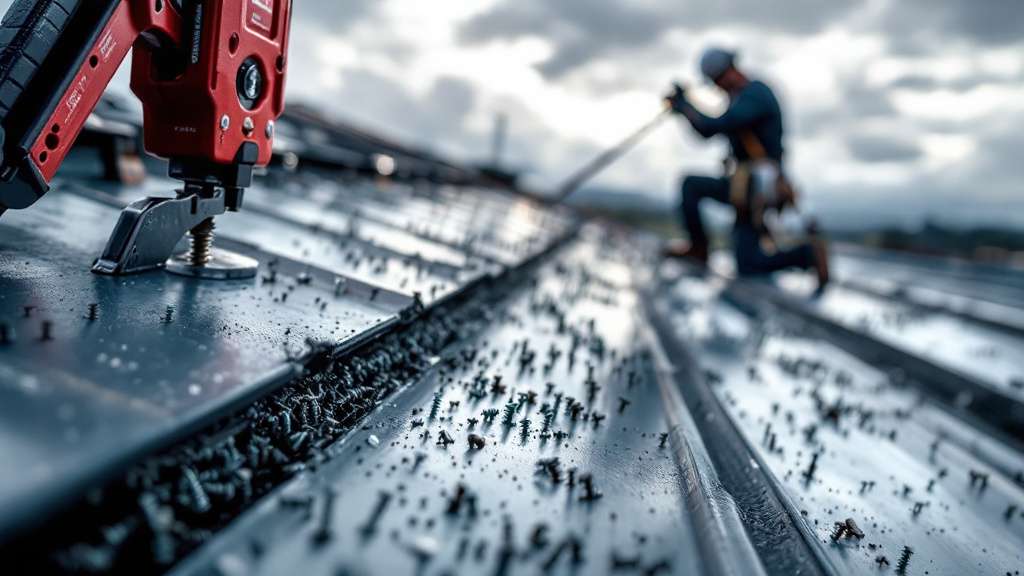
Imagine this: a sudden downpour turns into a raging storm, and instead of the reassuring patter of raindrops on your metal roof, you hear the dreaded drip, drip, drip of a leak. The culprit? Often, it’s improper screw installation. Securing your metal roof correctly is like fastening the buttons on a sturdy coat—the crucial step ensures long-lasting protection from the elements.
This comprehensive guide is your blueprint to understanding the often-overlooked aspect of metal roofing: screws. We’ll equip you with practical knowledge, bust common myths about different types of metal roofing, and empower you to make informed decisions that guarantee your roof stands strong for years.
What you’ll gain from this guide on installing a metal roof:
- Confidently calculate the exact number of screws your roof needs, avoiding costly mistakes.
- Master the art of installing a metal roof by understanding the various screw patterns and their significance. of selecting the right screw type and length for optimal performance.
- Become a pro at screw placement techniques, ensuring a watertight and secure roof.
- Learn from the best as we share expert tips and troubleshoot common installation pitfalls.
Let’s dive in and transform you into a savvy metal roofing enthusiast!
Understanding Metal Roofing Screws: The Unsung Heroes
Metal roofing screws aren’t just bits of metal; they’re the tiny but mighty anchors holding your roof against wind, rain, and snow. Think of them as the threads in a strong fabric, binding everything together. Their role goes beyond simply attaching the roof; they directly influence its structural integrity and weather resistance.
Why Screw Selection Matters
Choosing the right screws is akin to selecting a strong foundation for your house—it’s fundamental. High-quality screws, specifically designed for metal roofing, offer superior corrosion resistance, holding power, and longevity compared to their generic counterparts.
“Using the correct screws is non-negotiable,” says veteran roofer and installer Mark Jenkins. “It’s an investment that pays off by preventing costly repairs and ensuring your peace of mind.”
Calculating Screw Requirements: Taking the Guesswork Out
Determining the right number of screws isn’t about haphazardly scattering them across your roof. A systematic approach ensures optimal holding power without compromising the material’s integrity.
Basic Calculation: The 80% Rule
The industry-standard “80% rule” provides a solid starting point:
- Rule of Thumb: You’ll need approximately 80 screws per 100 square feet of roofing (one roofing square).
Example: For a 1,500 square foot roof:
- Calculate total square footage to determine how many screws you will need for your project. 1,500 sq ft / 100 sq ft/square = 15 squares
- Apply the 80% rule: 15 squares x 80 screws/square = 1,200 screws
Remember: This is a general guideline. Factors like roof complexity, climate, and slope will influence the final count.
Beyond the Basics: Factoring in Complexity
Let’s delve deeper into those influential factors, using real-world examples to illustrate their impact.
4. Influences on Screw Requirements: It’s Not One-Size-Fits-All
Every roof is unique, and understanding how different elements impact screw requirements is essential for achieving a secure and long-lasting installation.
Roof Complexity: From Simple to Intricate
A simple, single-sloped roof requires fewer screws than a complex design featuring multiple gables, dormers, or valleys.
Think of it like building with Lego blocks—a basic structure needs fewer connectors than an elaborate castle.
Local Climate Conditions: Braving the Elements
A roof in sunny Florida faces different challenges than one in snowy Alaska. Regions prone to high winds, heavy snowfall, or frequent storms require a higher screw density for enhanced wind uplift resistance.
Case in Point: In 2017, Hurricane Irma ripped through the Caribbean, exposing the vulnerability of inadequately secured roofs. Many metal roofs failed due to insufficient screw fastening, highlighting the importance of climate-specific considerations.
Roof Slope: The Angle of Protection
The steeper the roof pitch, the greater the force exerted by wind and gravity. This necessitates closer screw spacing to counteract uplift and ensure panels remain firmly in place.
[Diagram: Illustration demonstrating how screw placement changes with varying roof slopes.]
Rule of Thumb: Steeper slopes generally require more screws per square foot.
Types of Metal Roofing and Their Screw Needs
Just as you wouldn’t use a hammer to drive in a screw, different metal roofing styles demand specific screw types and installation techniques. Let’s explore the most common types:
Standing Seam Roofs: The Concealed Champions
Standing seam roofs are known for their sleek, modern aesthetic and concealed fastener system. Screws are hidden within the seams, providing a clean look and exceptional weather resistance.
Screw Placement: Screws are driven through the seam’s top, securing panels to the roofing structure.
Corrugated Metal Roofs: The Classic Choice
Corrugated metal roofs, with their distinctive wave-like pattern, are a popular choice for residential and agricultural buildings. Screws are typically installed at each wave peak, ensuring a secure hold.
Screw Placement: Screws penetrate the metal panel and underlying structure, creating a tight seal.
Metal Shingles: Blending Style and Durability
Metal shingles mimic the look of traditional asphalt shingles while offering the longevity and durability of metal. Screws are often hidden beneath overlapping panels, preserving the roof’s aesthetic appeal.
Screw Placement: Specific screw locations vary depending on the shingle design, but generally involve securing panels to the roof deck.
R-Panel Metal Roofs: The Versatile Option
R-panel roofs feature distinct ribs (the “R” refers to the rib shape), offering a robust and cost-effective roofing solution. Screws are installed through these ribs, securing the panels to the roof structure.
Screw Placement: Screws are placed at each rib and along the panel edges, ensuring a secure hold.
Pro Tip: Always consult the manufacturer’s installation guidelines for your specific metal roofing type, as recommendations may vary.
Choosing the Right Screws: A Buyer’s Guide
Navigating the world of metal roofing screws can feel overwhelming. This section will arm you with the knowledge to choose the right screws for your project.
Screw Types: Not All Screws Are Created Equal
– Self-Drilling Screws: These workhorses feature a drill-like tip, eliminating the need for pre-drilling. They’re ideal for attaching metal roofing to metal framing.
– Self-Tapping Screws: These screws form their own threads as they’re driven in, making them suitable for attaching metal roofing to wood framing.
Pro Tip: Opt for screws with a painted head that matches your roof color for a seamless and aesthetically pleasing finish.
Screw Length: Finding the Perfect Fit
Choosing the correct screw length is crucial for ensuring a secure hold without compromising the roofing material.
Rule of Thumb: The screw should be long enough to penetrate through the roofing panel and into the supporting structure by at least ¾ of an inch.
Screw Length Chart:
| Metal Roof Type | Typical Panel Thickness | Recommended Screw Length |
|---|---|---|
| Standing Seam | 24 gauge | 1.5 inches |
| Corrugated | 26 gauge | 1.25 inches |
| Metal Shingles | 29 gauge | 1 inch |
| R-Panel | 22 gauge | 1.75 inches |
Note: This is a general guideline. Consult your roofing material manufacturer for specific screw length recommendations.
Optimal Screw Placement: Mastering the Techniques
Even with the right screws, improper installation can lead to leaks and premature roof failure. Let’s explore the best practices for optimal screw placement:
Ideal Screw Placement: Striking the Right Balance
- Target the Flat Areas: Aim for the flat sections of the roofing panel, adjacent to the raised ribs. This ensures a tight seal and prevents water from pooling around the screw head.
Stagger Your Screws: Avoid installing screws in a straight line. Instead, stagger them in a pattern resembling a brick wall. This enhances the roof’s structural integrity and distributes the load more evenly.
Overlaps and Edges: Sealing the Vulnerable Zones
- Overlap Areas: Pay close attention to areas where roofing panels overlap. Install screws 1-2 inches from the overlap edge, ensuring a watertight seal.
Edges and Corners: These areas are particularly susceptible to wind uplift. Install screws closer together along edges and corners, following the manufacturer’s recommendations.
Screw Spacing for Stability: Finding the Sweet Spot
Proper screw spacing balances holding power with material integrity. Too close, and you risk damaging the panels; too far apart, and you compromise wind uplift resistance.
General Guideline for Screw Spacing:
| Roofing Span | Typical spacing in your screw pattern is essential for optimal performance. |
|---|---|
| Up to 3 feet | 12 inches |
| 3-4 feet | 18 inches |
| Over 4 feet | 24 inches |
Note: This is a general guideline. Consult your roofing material manufacturer and local building codes for specific screw spacing requirements.
Correct Screw Installation Techniques: Tips from the Pros
Now that you understand screw selection and placement, let’s explore the finer points of installation. These expert tips will elevate your roofing game:
Using the Right Screw Type for the Job
Always use the correct screw type for your roofing material and supporting structure. Mismatched screws can lead to poor holding power, leaks, and premature roof failure.
Example: Using a self-drilling screw designed for metal framing on a wood structure can result in a loose connection and potential leaks.
Pre-drilling for Precision: When and How
While self-drilling screws eliminate the need for pre-drilling in most cases, it can be beneficial when:
- Attaching to Thick Metal: Pre-drilling pilot holes prevents screw wandering and ensures a straight, secure connection.
- Working with Hardwoods: Pre-drilling makes driving screws into dense wood easier and prevents splitting.
Pro Tip: If pre-drilling, use a drill bit slightly smaller than the screw’s diameter for a snug fit.
Avoiding Over-Torquing: A Delicate Balance
Over-tightening screws can strip threads, damage roofing panels, and compromise the washer’s sealing ability.
Tips for Avoiding Over-Torquing:
- Use a Screw Gun with Adjustable Torque: Set the torque to the manufacturer’s recommended setting to ensure that screws are properly placed without damaging the substrate.
- Listen for the “Click”: Many screw guns emit a clicking sound when the desired torque is reached.
- Practice on Scrap Material: Get a feel for the correct torque before working on your roof.
Remember: Aim for a snug fit—the screw head should be flush with the roofing material without indenting the surface.
Real-World Application: Common Pitfalls and Solutions
Even experienced roofers encounter challenges. This section addresses common screw installation mistakes and provides practical solutions.
Frequent Mistakes: Learning from Experience
- Incorrect Screw Type: Using drywall screws or other unsuitable fasteners leads to poor holding power and potential leaks.
Solution: Always use screws specifically designed for metal roofing.
- Over-Driven Screws: Understanding how to place screws to avoid over-driving properly is crucial. Over-tightening can damage panels, strip threads, and create leak points.
Solution: Use a screw gun with adjustable torque and practice on scrap material.
- Under-Driven Screws: Screws that aren’t driven in far enough won’t create a tight seal, leaving your roof vulnerable to leaks.
Solution: Ensure the screw head sits flush with the roofing material.
- Misaligned Screws: Screws driven at an angle can create gaps and compromise the roof’s weather resistance.
Solution: Use a straight edge as a guide and practice driving screws straight.
Expert Tips for Flawless Installation: Words from the Wise
- Invest in Quality Screws: High-quality screws with corrosion-resistant coatings offer long-lasting performance.
- Use a Magnetic Screw Guide: This handy tool keeps screws aligned and prevents them from falling off the roof while ensuring the correct screw pattern is maintained.
- Work in Small Sections: Install a few rows of panels at a time, ensuring proper alignment and screw placement.
- Don’t Be Afraid to Ask for Help: If you’re unsure about any aspect of the installation, consult a qualified roofing professional.
Conclusion: Your Roof, Your Fortress
Congratulations! You’re now armed with the knowledge and practical advice to confidently tackle your metal roofing project, including the importance of substrate preparation. By understanding the critical role of screws, applying proper installation techniques, and learning from common mistakes, you’ll ensure your roof stands strong against the test of time.
Remember: A well-installed metal roof, secured with the right screws, is an investment in your property’s longevity, value, and peace of mind.
For Further Exploration:
- Consult your local building department for specific roofing codes and regulations.
- Contact metal roofing manufacturers for detailed installation guides and technical specifications.
- Seek out reputable roofing contractors for professional installation and guidance.
FAQs: Addressing Your Questions
How does the type of metal roofing affect the number of screws required?
Different metal roof types have varying screw requirements based on their design and installation methods. For example, standing seam roofs generally require fewer screws due to their concealed fastener system, while corrugated roofs need screws at each wave peak. Always consult the manufacturer’s guidelines for your specific roofing material.
Does the local climate influence the screw count in metal roofing?
Yes, climate plays a significant role. Regions with high winds, heavy snowfall, or frequent storms necessitate a higher screw density for enhanced wind uplift resistance. Consult local building codes and a qualified roofing professional to determine the appropriate screw spacing for your area’s climate conditions.
How does the slope of a roof impact the number of screws needed?
Steeper roofs require closer screw spacing to counteract the increased force exerted by wind and gravity. Consult your roofing material manufacturer and local building codes for specific screw spacing recommendations based on your roof’s slope.
Why is screw length important in metal roofing installation?
Screw length determines the secureness of the connection. A screw that’s too short won’t adequately penetrate the roofing panel and supporting structure, while a screw that’s too long can protrude through the underside of the roof deck, potentially causing damage or leaks. Always use the manufacturer’s recommended screw length for your specific roofing material and supporting structure.