Are you ready to make your cabinets look new again? Sanding is the first step. We’ll show you how to sand cabinets for painting. This way, you’ll get a beautiful finish.
Sanding gets rid of old finishes and makes the surface smooth. This helps the paint stick better. With the right tools and steps, you can upgrade your kitchen without spending a lot.
Introduction to Sanding Cabinets
Sanding cabinets is key in painting projects. It makes your work last longer and look better. It removes old finishes and lets paint stick well.
If you don’t sand, paint might peel or chip. This ruins your cabinets’ look. A smooth surface means a better finish.
Why Sanding is Important
Sanding is very important. It helps paint stick to the cabinet. This makes the paint last longer and look brighter.
Without sanding, paint might not stick well. This leads to wear and tear sooner.
Tools You’ll Need for Sanding
You’ll need some tools for sanding. Here’s what you need for good sanding:
- Sander: An orbital sander works best. Use hand sanding for corners.
- Sandpaper: You’ll need 120, 180, and 220 grits for different stages.
- Dust Collection: A shop vacuum helps keep your area clean.
Using these tools will help you get a great finish. Good sanding is the base for a good paint job. So, take your time to do it well.
Preparing Your Workspace
Before starting your cabinet sanding project, getting your workspace ready is key. A tidy space boosts your work speed and keeps you safe while sanding.
Choosing the Right Location
Find a spot with good air flow to cut down dust. Outdoor areas are best because they have more air and less dust. Make sure you have enough space to move around your cabinets easily.
Safety Precautions
Keep yourself safe by wearing the right gear:
- Eyewear: Safety goggles keep dust and debris out of your eyes.
- Hearing Protection: Earplugs or earmuffs lower the noise you hear.
- Respiratory Protection: A dust mask or respirator protects your lungs from dust.
Following these tips for a safe sanding area and a well-prepared workspace lets you start your project feeling confident and safe.

Removing Cabinet Doors and Hardware
First, you need to remove the cabinet doors and hardware safely. This step is key for a smooth painting process.
Detaching Doors Safely
Start by carefully taking off the cabinet doors from their hinges. A good plan makes this easier. Here are some tips:
- Label each door with sticky notes as you remove them.
- Take note of the locations of hinges and other hardware during the cabinet door removal.
- Consider using a power drill to speed up the process; just be cautious to avoid damaging surfaces.
Storing Hardware Securely
After removing the doors, focus on organizing the hardware. This makes putting things back together easier. Follow these tips:
- Place screws, hinges, and knobs in labeled bags or containers.
- Keep all cabinet parts in a designated area to prevent misplacement.
- Document where each piece belongs to streamline the reinstallation later.
This organized way of storing parts saves time. It also makes sure you have everything you need when painting. Being careful in this step helps a lot when you start sanding and painting.
Choosing the Right Sandpaper
It’s key to pick the right sandpaper grit sizes for sanding cabinets. Each grit size has a role in the sanding process. This helps you get smooth surfaces ready for paint or stain.
Grit Sizes Explained
Sandpaper has different grit sizes, showing how coarse it is. You can choose the right one for your job:
- Coarse Grit (40-80): Good for fast material removal and deep scratches.
- Medium Grit (100-150): Best for removing marks from coarse grit and getting ready for finer sanding.
- Fine Grit (180-220): Great for making surfaces perfect before painting or staining.
- Extra Fine Grit (320+): Use between coats to improve adhesion and smoothness.
When to Use Different Grits
Using different grit sizes in order makes a big difference in your finish:
- Begin with 120-grit to handle old finishes or scratches well.
- Then, use 180-grit to smooth surfaces more, getting them ready for finer grit.
- End with 220-grit for a flawless base that helps paint or stain stick well.

Choosing the right sandpaper grit sizes helps you smoothly go through the sanding process. This leads to beautiful finishes on your cabinets. Remember these tips for your painting project!
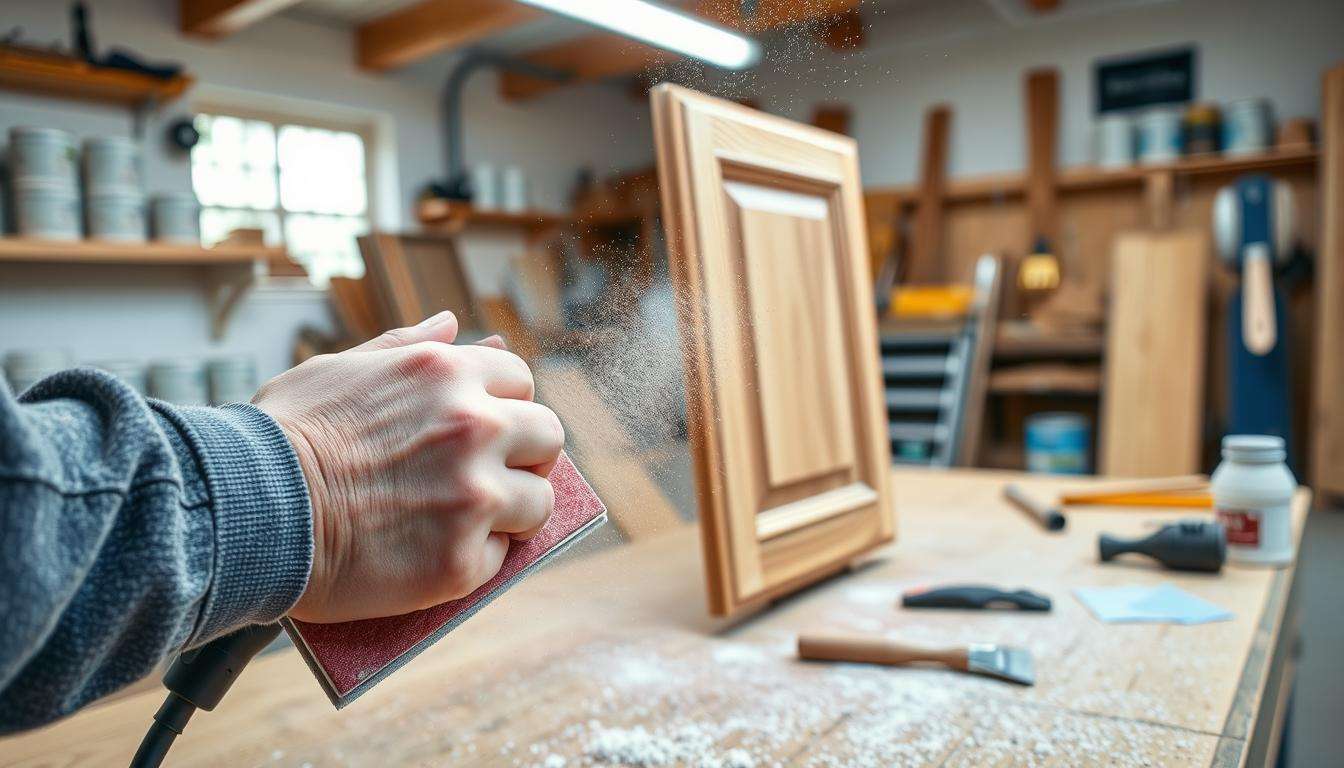
Sanding Techniques for Cabinets
Sanding cabinets well means using the right methods for a smooth paint job. Knowing when to use hand sanding and power sanding is key. We’ll look at both, when to use them, and how to get a uniform finish.
Hand Sanding vs. Power Sanding
Hand sanding and power sanding both have their uses. Power sanders are great for big areas fast, especially on flat surfaces. The Mirka 3″ Deros 350XCV 5mm random orbital sander is a top pick, costing about $550. It’s perfect for those who want a strong sander that’s not too big.
Hand sanding is better for small, detailed spots like corners and edges. The SKIL Corded Detail Sander is a good choice for these areas, costing under $30. It’s great for getting into tight spots without losing quality.
For the best results, mix both methods. Use a power sander for big areas and hand sand for details.
Tips for Even Sanding
To get an even finish, follow these hand sanding tips:
- Keep the sanding pressure even to avoid scratches and uneven spots.
- Sand with the wood grain to protect the surface and keep it looking natural.
- Keep your sandpaper clean to prevent dust buildup. This makes your sandpaper last longer and work better.
Start with coarser grits like 120 for removing old paint. Then move to finer grits like 220 for smoother surfaces. For woods like mahogany or oak, use wood-grain filler for an even smoother finish.
Take your time with these steps for a professional-looking finish. Use both hand and power sanding to get amazing results on your cabinets.
Dealing with Stains and Finishes
Before you paint, it’s key to know what’s on your cabinets. They might be painted, stained, or varnished. Knowing this helps you choose the right sanding method. Each finish needs a special way to remove it well.
Figuring out what’s on your cabinets makes sanding easier. It also helps your project look great.
Identifying Existing Finishes
Start by looking at your cabinets carefully. Check for signs of old finishes. A small test spot can show you what’s underneath.
If it feels smooth, it might have varnish or urethane. Stain shows as a darker area that might look like wood. Knowing this helps you pick the best way to remove stains.
Techniques for Removing Stains
For removing stains, a good paint stripper works well. Make sure to follow the instructions. Use a putty knife to scrape off the old finish.
After stripping, sand lightly. This makes sure there’s nothing left behind. It also gets your cabinets ready for new paint. For more tips, see this guide.
| Finish Type | Identification Method | Recommended Removal Technique |
|---|---|---|
| Paint | Slick surface, often with visible chips | Paint stripper plus sanding |
| Stain | Natural wood grain visible, may appear uneven | Paint stripper followed by putty knife scraping |
| Varnish | Smooth, shiny surface; potentially yellowing | Heavy-duty stripper, followed by fine-grit sanding |
Cleaning Up After Sanding
After sanding, you need to clean up well. This is key for a smooth paint job and keeping things dust-free.
Dust Removal Methods
Begin by vacuuming to get rid of big dust. Then, use a tack cloth to clean all surfaces. This makes sure no small dust is left behind.
This cleaning is very important for a perfect paint job. It stops dust from ruining the finish. Always wear a mask to avoid breathing in dust.
Preparing for Painting
After cleaning, get ready to paint. You’ll need Sherwin Williams Emerald Urethane Trim Enamel Paint and Zinsser Cover Stain as primer. Primer helps block stains and makes paint stick better.
Lightly sand between primer coats for the best look. Let each coat dry for 24 hours. This makes the paint job smooth and even.
Final Thoughts on Sanding Cabinets
As we finish our guide on sanding cabinets, let’s talk about common mistakes. Rushing can make surfaces uneven, ruining your paint job. Also, don’t forget to change sandpaper when it gets dull. This keeps textures even.
Always wear safety gear to avoid wood dust and injuries. It’s very important.
If you want to get better at painting, there are many resources out there. Look for blogs, YouTube tutorials, and local classes. These can help you improve and inspire you to do more projects.
Remember, sanding cabinets well takes time and the right tools. With effort and practice, you’ll get a professional look. Your cabinets will become beautiful parts of your home.